Lithium Battery Pack Project
This battery pack was made with the intention of it being a backup power system for a 12V router. This is a step-by-step project that will teach you how to build a basic battery pack as a backup for things like 12V routers or even LED lights. This battery pack has 6x18650 batteries with a 3-cell battery management system and a buck-boost converter.
Difficulty rating: Beginner
Average time to build: 30 minutes.
Short description
This Battery Pack kit will teach you how to build a working backup power supply for a router.
With this kit, you will learn how a buck-boost converter works as well as a BMS.
Battery Pack building summary.
In this project, you will need the kit as well as a soldering iron, solder, and pliers to cut the nickel strip into smaller pieces so that they can easily fit onto the batteries.
Project Diagram
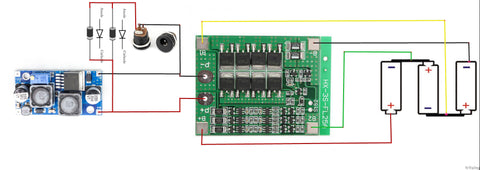
How the Battery Pack works
The battery pack will take over the power requirements of the router the moment the power goes off and will keep the router running for a period of time. The buck-boost converter is there to boost the voltage of the power bank to 12V when the batteries start to drop in voltage, this is needed otherwise the router will switch off after a couple of minutes. The BMS (Battery Management System) is there to balance the batteries when they charge and discharge.
Link to product bundle with price e.g. Sound to light components - R380.00
Step-by-step instructions.
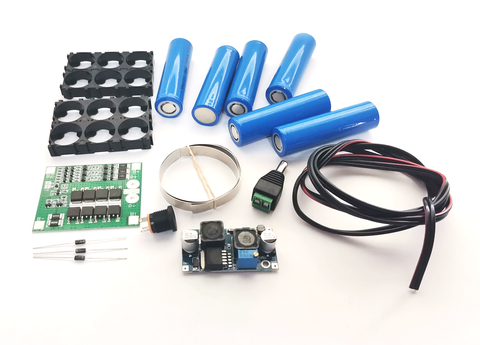
The above picture shows all the components that come with the kit.
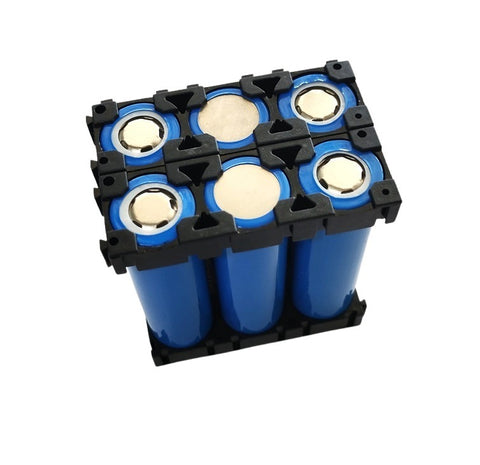
Step1
Place all of the batteries in the holders 3 side by side.
Step2.
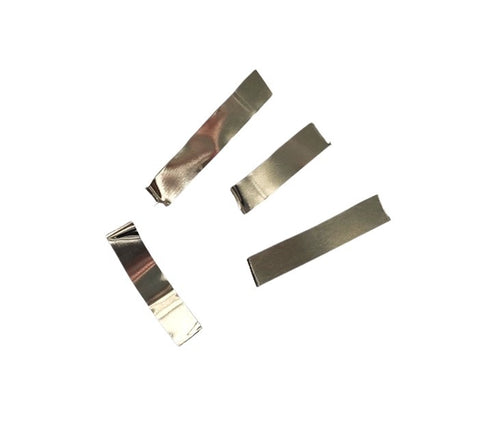
Cut the nickel strip into smaller pieces that will correctly fit on the batteries then place the nickel strip pieces in the correct order.
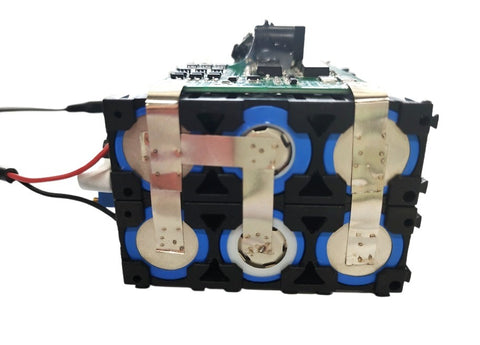
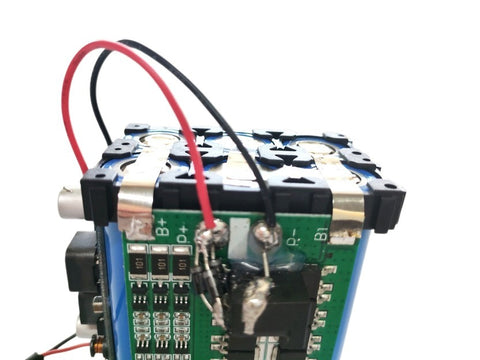
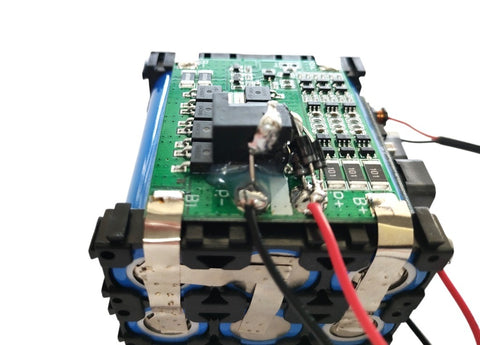
Step 3.
Connect the batteries to the BMS as shown below. For this step, you will need some more pieces of nickel strips. Also remember to connect the DC jack to the BMS's positive and negative and place the diodes in line with the positive this will give us a voltage drop protection for the BMS.

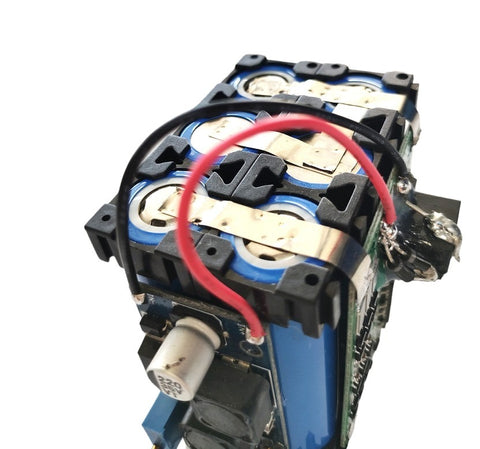
Step 4
Connect the Buck boost converter to the BMS, please ensure that the positive from the converter goes to the positive of the BMS and also the same with the negatives.
Step5
Finally, we can inspect the battery pack and see if it all works with a multi meter.
Lithium Battery Pack