Getting Started with Arduino & ESP32 Interfacing
Level: Beginner
Introduction
Do you want to do more than just blink an LED on a microcontroller? Do you want to make your Arduino or ESP32 projects interactive? Do you want them to react to their environment by displaying information on an LCD or controlling a motor? If so, interfacing Arduino and ESP32 microcontrollers with external components and modules are key.
Arduino and Esp32 microcontrollers are the most popular tools for connecting external components like LCDs and motors to create interactive applications. In this post, we will give you a short overview of how all kinds of components can be hooked up to microcontrollers.
It is easier than you think.
What Are External Components and modules?
External components are all the components you will use in addition to your Arduino or ESP32 microcontroller. These include things like LCDs, motors, and sensors.
Modules are PC boards (PCB) with the external components already soldered onto a PCB. Often external components require other components, like transistors and resistors, to work. Modules make it easy to connect these components to a microcontroller.
Arduino and ESP32 boards have input/output (I/O) pins, which allow them to read from or control external components and modules. By sending electrical signals through these I/O pins, Arduino and esp32 can interact with external components like LCDs and motors.
Connecting Arduino or ESP32 with external components allows you to create applications that interact with their environment. For example, you can use Arduino and ESP32 to create a temperature sensor that displays the current temperature on an LCD.
Benefits of Arduino & esp32 Over Other Microcontroller Platforms.
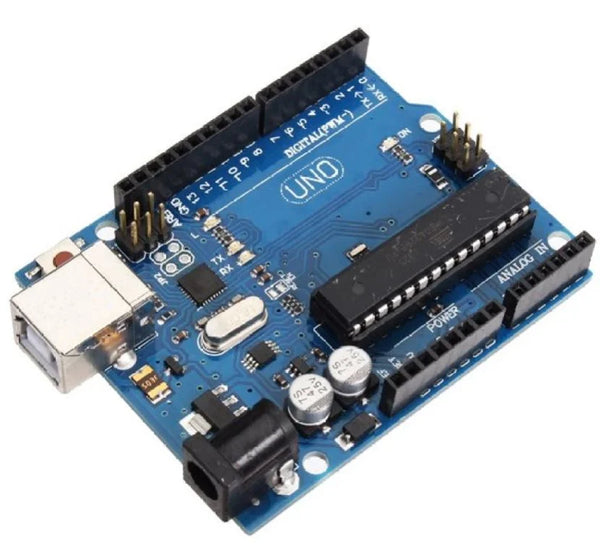
Below is an image of the Arduino Uno.
And here is a picture of the ESP32.
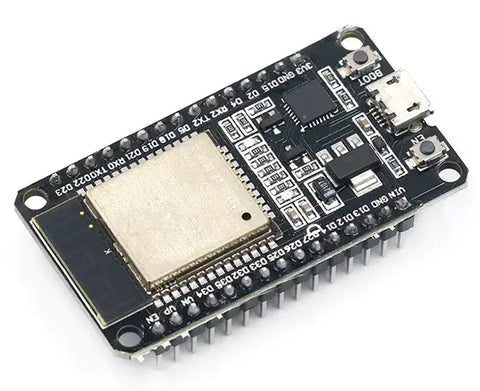
Arduino and ESP32 are popular microcontroller platforms for connecting external components because of their user-friendly development environments. Arduino is an open-source platform that can be used to create interactive projects with minimal effort, while the esp32 has Wi-Fi capabilities, making it ideal for creating internet-connected projects.
Additionally, Arduino and ESP32 both have low power consumption, which makes them great options for battery-powered designs.
Another significant benefit is that both microcontrollers have a massive community behind them that can help other community members when they get stuck. Because of these communities, there are many step-by-step projects and example project code.
How to Connect Arduino and ESP32 With External Components?
Input and output pins
The Arduino and ESP32 microcontrollers come with built-in pins for connecting external components. These pins are called I/O pins and stand for Input and Output pins.
Input pins read data into a microcontroller, for example, the temperature of a temperature sensor.
Output pins send data from a microcontroller, as an example, to control the speed of a motor or make the motor turn clockwise or anticlockwise.
Connecting external components and modules to a microcontroller.
You can connect some components and modules directly to the microcontroller pins using jumper cables, but mostly you will use a breadboard and jumpers.
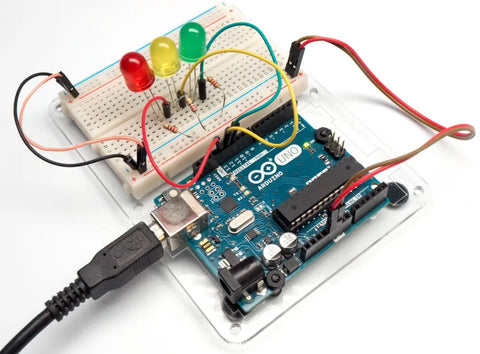
You use jumper wires from the Arduino or ESP32 board pins that you plug into the breadboard. Then, you can stick the components directly into the breadboard or use more jumpers to connect components and modules to the breadboard.
Breadboards are neat because no soldering is required and you can re-use your components by simply pulling them out of the breadboars. The same with jumper cables, you can use them over and over again,
Breadboards have connection tracks inside them that connect all the components and jumper cables in a specific way together. There is a lot to learn about breadboards but for now, this will give you an understanding of the basic principle of how components and modules can be connected to a CPU.
Module pins
The module below detects if it is day or night and can be used with a microcontroller to create for example a day-night light project.
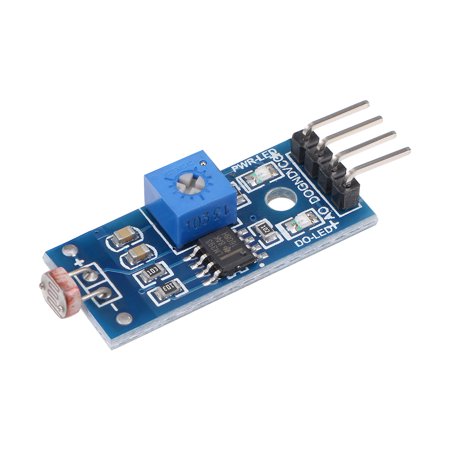
Typically, modules that can connect to a microcontroller have the following pins: Ground, Vcc (power supply), Data In and/or Data Out. These pins are used to connect to your microcontroller. Of cause, they need to be connected to the correct pins of a microcontroller.
The Arduino and ESP32 usually require only three (3) and sometimes four (4) wires to connect the module.
The ground is connected to Arduino/esp32 ground pins. All microcontrollers have power pins. These are the GND pins and then also the power pins. These pins are specifically added to the microcontroller boards to provide an easy way to provide power to your external components and modules.
Vcc is connected to Arduino/esp32 5V power source.
The data in and/or data out pins connect to the Arduino or ESP32 digital I/O pins. The data in will send data from the microcontroller, and the data out will send data to the microcontroller. Most modules have either an input or output pin but not both.
Now that all is connected.
Once your Arduino or ESP32 is connected to all your external components or modules, you can write code for it using Arduino IDE software program). This code will allow Arduino and ESP32 to interact with the external components and control them based on certain conditions.
It is thus now all about programming the microcontroller to interact with the external components and modules. All the programming software comes with lots of programming examples to get your feet wet.
The programming will take up most of your time as I am sure you realise by now that the connecting up of sensors etc. is not difficult and rather quick to do.
Examples of Arduino & ESP32 Interfacing with External Components and modules.
One example of Arduino interfacing with external components is using it to control a motor. Arduino can be connected to an H-bridge circuit (comes as a separate and thus external circuit board), allowing it to control the motor's direction by sending electrical signals through its digital I/O pins.
Another example is connecting Arduino to an LCD display. Arduino can send data to the LCD display via its I/O pins. Similarly, esp32 can also be connected to motors and LCDs through its various I/O pins. You can display all kinds of data, including the data from sensors like temperature sensors and light sensors.
How about connecting a GSM module to control external devices via SMS messages? It is very possible to do, although I would suggest working with basic modules at first.
As a last example, you can hook up a buzzer for audio alerts when the temperature from a temperature sensor reaches a specified temperature. This functionality can be extended to start a fan or a motor etc.
Conclusion
I hope that this short and to-the-point article will answer some of the questions you have on interfacing other components like sensors to a microcontroller.
By now, you should better understand how Arduino and ESP32 boards can be connected to external components and modules like motors, sensors, GSM modules, LCDs and much more.
Arduino is an excellent choice for beginners due to its simple setup process and abundant tutorials and resources. On the other hand, the ESP32 boards are ideal for projects that require Wi-Fi-enabled capabilities or more processing power. You can create interactive applications using these popular microcontroller platforms by understanding the basics of how to connect Arduino and esp32 to external components.
Arduino is the easiest microcontroller to learn; once mastered, you can move on to the ESP32, which opens the door to WiFi and even Bluetooth projects.
There are a lot more regarding this topic, but you should now have a broad understanding of interfacing with microcontrollers.
How about subscribing to our bi-monthly product, project, and blog post rundown? That way, you will stay up to date on all newly added stuff to our site.
Getting Started With Arduino ESP32 Interfacing