Are you a parent who struggles to find the right assistance when it comes to SCHOOL PROJECTS or ASSIGNMENTS? We want to make your life easier by finding all your project needs in one stop! From the base to the last drop of paint. We have a lot of fun kits and projects that you will find interesting. We have a team of experts who are ready to assist in all kinds of electronic issues and inquiries, e.g. school projects.
Education projects are more than merely tasks; they give students a chance to apply what they learn in the course of their studies, fostering creativity and developing important skills. In the next few blogs, we'll explore some of the outstanding school projects that our students have managed to complete, highlighting their dedication and enthusiasm for education.
How to plan the projects and assignments for your school
What is your GOAL: I want to make a hand game that shows how an electric circuit works.
To flesh out this goal, the student uses the 5 W's and H again. She or he is defining a new situation that will achieve the goal. (These are the objectives).
- Who? I, and any help/assistance
- What? I will make a steady-hand game
- Where? In school and at home
- When? This week in school and at home
- Why? To show how an electric circuit works
How? I will design a circuit. The circuit will have one free positive conductor. This conductor will be held by the person playing the game. When the positive conductor touches the positive side of the components that are linked to the negative pole, it will complete the circuit and the components will be powered. By removing the positive conductor the components in your circuit will have no power and they will be in the off state. (See drawing below).
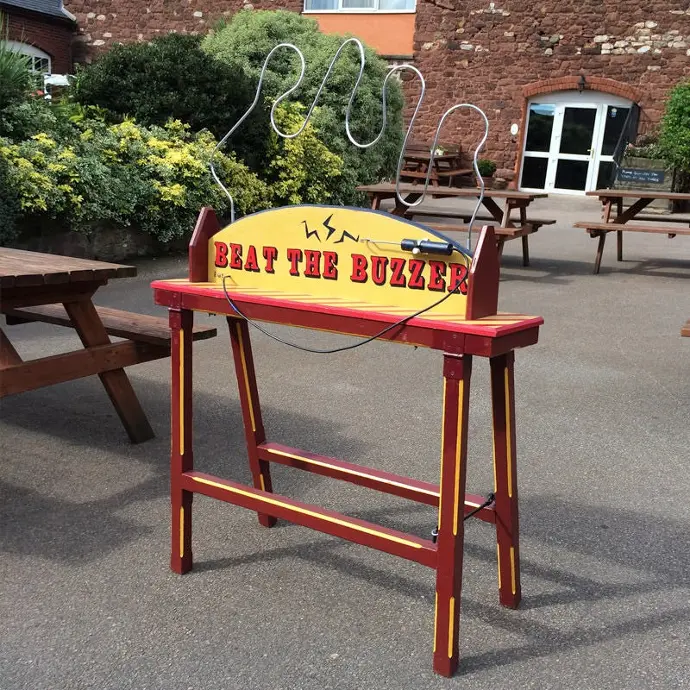
THE STEADY HAND / WONKY WIRE GAME
SCHOOL PROJECT VERSION
The steady hand game, a popular carnival or party game, tests hand-eye coordination and patience. It's about guiding a metal loop or wand through a twisted wire or path without touching, completing an electrical circuit, and triggering a buzzer or light, signaling a "buzz" or "shock."

A typical steady-hand game works like this:
Setup: There's a board with a twisted wire path, often resembling a challenging design like a loop-de-loop, zigzag, or maze. At the path's start, you find a metal wand or loop attached to a flexible wire. At the path's end, an indicator, be it a buzzer, light, or something else.
Rules: The player's objective is to move the metal wand or loop from the path's start to its end, avoiding wire contact. If the wand touches the wire, it completes an electrical circuit, triggering the buzzer or light, resulting in a "buzz" or "shock." Completing the course with no mistakes is the goal.
Challenges: Increasing difficulty is possible by narrowing the wire path, adding obstacles, or adjusting circuit sensitivity. Some game versions offer multiple difficulty levels, letting players choose their preferred challenge.
Scoring: Points may be awarded based on performance in some game versions. This might include scores based on course completion time or the number of mistakes made.
A steady hand, good hand-eye coordination, and a gentle touch are vital for success in the steady-hand game. Frustration and entertainment often come hand in hand, particularly in competitive play. The game's common sights are fairs, amusement parks, and carnival booths, where players can win prizes according to their performance.
Part List
| ITEM | DESCRIPTION |
|---|---|
| Buzzer | Buzzer that can operate on a 3V battery. |
| Wonky wire | Bare uninsulated stiff wire, Steel, or copper will do. |
| Metal ring | Bare metal ring, like a soda can ring or a washer |
| Handle or wand | Old pen as the handle or wooden dowel, and a short piece of solid wire for the loop |
| Tape | Insulation tape/ Electrical tape is best, but any tape should work |
| Base | A wooden board works best, you can also use a cardboard box. We've found that the crooked wire is more fragile because of the cardboard box. |
| Led's | 2x 3V led's |
| Switch | a Normale latching SPST switch to switch the game on/off |
| Wiring | +- 0.2mm insulated conductors. 2-3M Red and Black |
| Motor | 3-6V Motor will work well. A propeller is needed for the effect. ( For a fun finish effect, the motor is only an extra.). |
| Battery holder | Battery holder for 2xAA or 2xAAA will give you 3V |
| Resistor | Resistors will not be needed if your LEDs are 3V like your supplied voltage. |
| Batteries | 2xAA or 3xAAA Batteries will be required. |
STEP 1
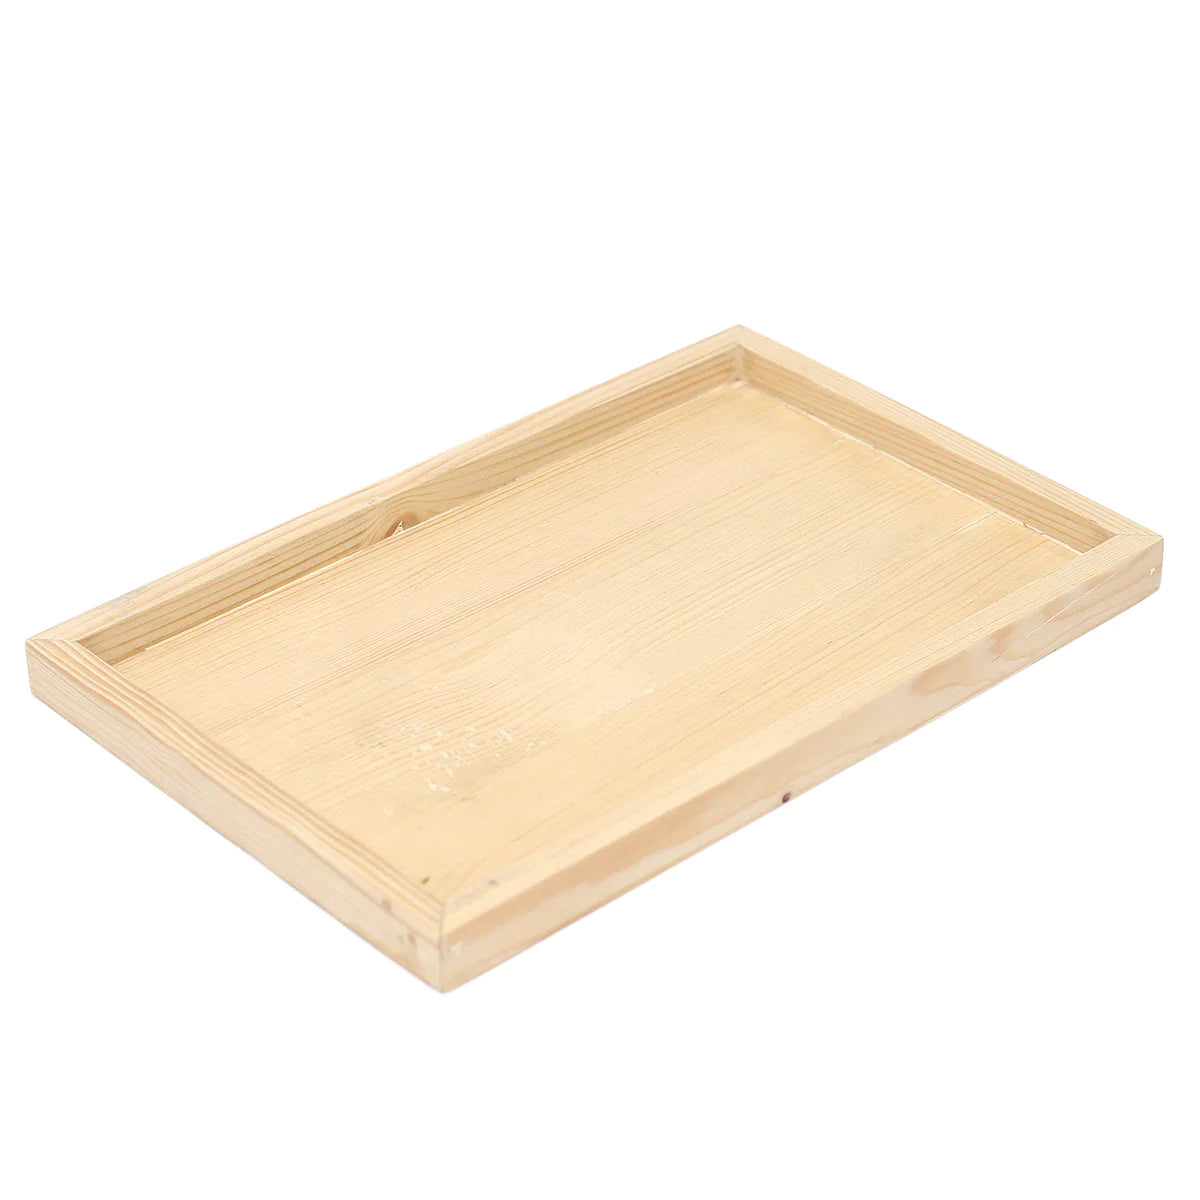
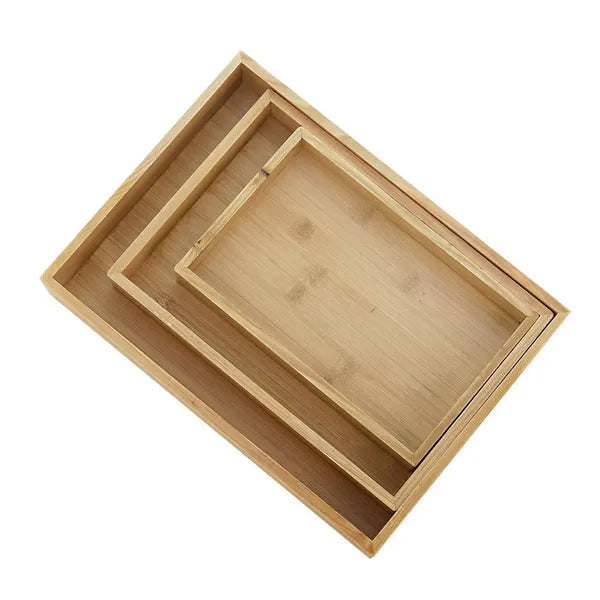
PREPARE THE BASE:
The reason you're going to use a base with edges is that you're going to be doing all the connections at the bottom of the base. It makes the project much more elegant by doing so.
Get started by painting a cardboard box or wooden base for your steady-hand game. To evenly cover the entire surface, use a brush and acrylic paint. For the full coverage, you may need to apply several coats. Before you apply the next coat, dry each one thoroughly.
Prepare the Base: Cut down the thin wood into a rectangular shape. The size depends on you, but typically it's around 30 x 45 cm.
For the edges, cut two shorter and two longer pieces of wood. You can use glue, nails or screws to attach the edges to the wooden board.
The reason you're going to use a base with edges is that you're going to be doing all the connections at the bottom of the base. It makes the project much more elegant by doing so.
Get started by painting a cardboard box or wooden base for your steady hand game. To evenly cover the entire surface, use a brush and acrylic paint. For the full coverage, you may need to apply several coats. Before you apply the next coat, dry each one thoroughly.
STEP 2
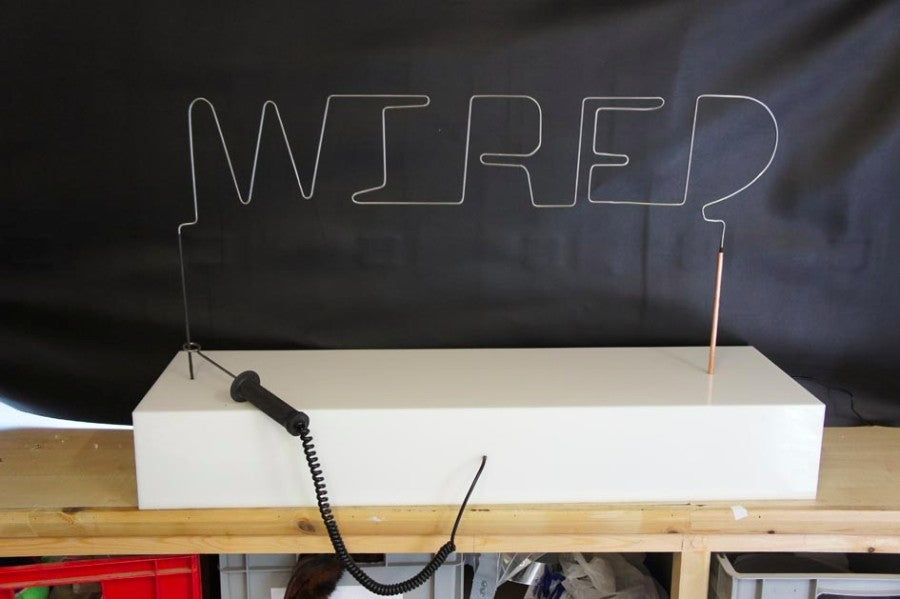
BEND YOUR WIRE PATH AND MAKE THE HANDLE:
Now this is where the creativity starts. The wire may be twisted to fit any name, letter, animal, or object. Just make sure if you make a bend, the wires are not passing each other closer than 5mm.
On the wooden base, plan your wire path. It may be simple or complex, as you wish. Use a pencil to draw the route. Attach the bent wire to the base by making two holes (one on each side). One end needs to go through the base because any side of the bent wire needs to be connected to the circuit. The other side will not have a connection. Insulate both ends of the wire, just above the base Making the handle: Make a small loop on one side of your bare copper wire or attach the metal ring/washer as the loop. Attach the wire to your pen or stick that will be held in your hand. Attach the insulated red wire to the copper wire of your handle. Make a small hole on the front side of your base and put the red wire from your handle through the hole.
STEP 3
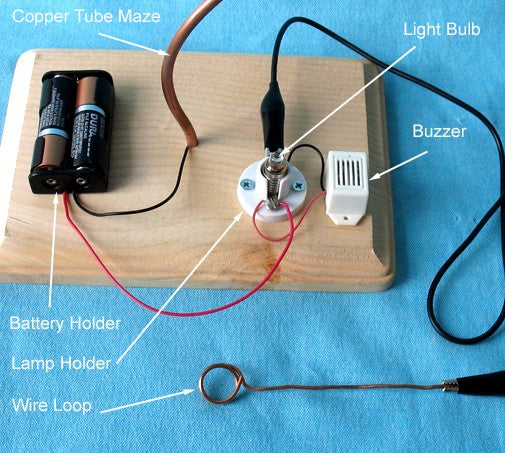
MOUNT THE COMPONENTS
You need to decide where on your base you want to mount your components. Mark them out on the base and make a hole for the components (LEDs). Use glue to mount the motor, switch, LEDs, and buzzer on the top of the base. Do the same with the battery holder on the bottom of the base. Right next to the components make small holes for the wiring to go through.
You can replace some of the components with similar components. Normally buzzers can work on 1.5-24VDC. This means it can work on any battery pack from 1.5-24VDC. Led's has a fixed voltage! For instance, a RED LED is about 1.8-2VDC and a blue LED is 3VDC and uses 20mA. If you use a 9V battery, you will have to add a resistor in line with the LED. 9V to 3V (Blue led) will be a 300R resistor on 20mA. I calculated this with OHM's law. a 330R Resistor is a more common value and will work perfectly. The supplied voltage should not be higher than 30% of the motor voltage. The closer the voltage, the longer your motor will last.
STEP 4
CONNECTING THE CIRCUIT
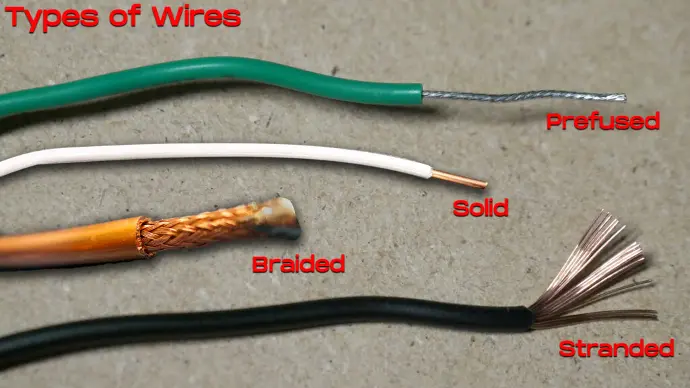
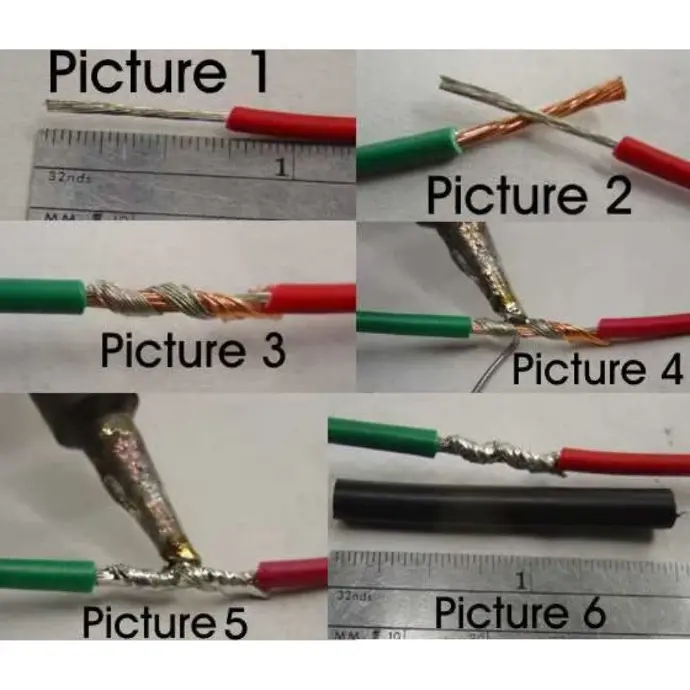
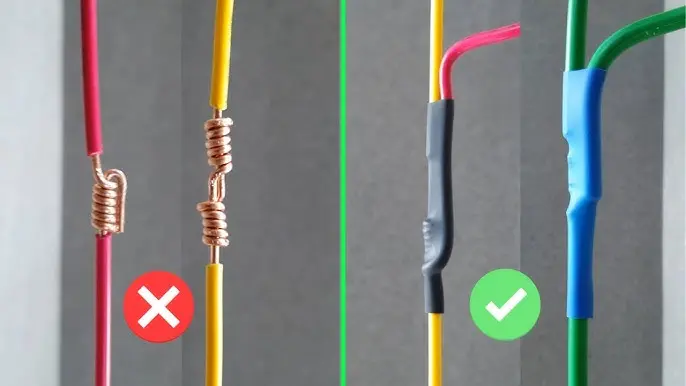
The wiring of the circuit is easier than it looks. Looking at the wiring diagram just above the part list will show you how to connect the whole circuit. Make sure to make proper connections by soldering or twisting the wires together (STRANDED WIRES connect the easiest). After connecting the components. Close the connections with insulation tape or heat shrink to avoid an electric short circuit.
Make sure the ring by the end of the wire path is not touching the path. How the circuit must be working is: When the game is turned on the (on/off) LED will be on. When the handle touches the wire path (while on) the buzzer and LED will be on. As the player completes the wire path, the motor will be on while touching the ring.

STEP 5
MAKE YOUR PROJECT VISUALLY APPEALING
Prepare Your Workspace: Set up a clean and well-ventilated area where you can be creative and make it dirty. To keep your work surface secure, cover it with a newspaper or sheet of cloth.
Choose Your Colors: Determine the colors you're going to be using for your continuous hand game. You can choose from a wide range of colors in acrylic paints, and you're choosing ones that look attractive to you.
Add Glitter: Use a small bottle to mix craft glue or clear school glue with glitter, so you can add some sparkle. A single color may be chosen, or a combination of different glitter colors can be created. The glitter glue mixture will be applied to the base of your game with only a tiny brush or, more importantly, a toothpick. To enhance the visual interest of your game, you need to be careful where glitter is applied.
Allow to Dry: The paint and glitter should be completely dried. Depending on the thickness of the paint and the glue, it can take several hours.
Optional Touch-ups: Once it's dry, you'll be able to touch up any areas that need more paint or glitter. Ensure that your design has a bright and appealing look.
You can seal the glitter (Optional): Clear varnishes and sealants can be applied on the glittered areas to make sure it stays in place or does not fall off. The instructions for the sealant you select are given by the manufacturer.
Final Inspection: Look at your steady hand game and make sure it's the way you want it. Make sure you remove any flaws or areas that require more glitter and paint.
FINAL THOUGHTS
In conclusion, this blog post serves as a comprehensive guide for parents and students seeking assistance with school projects, specifically focusing on creating a Steady Hand Game to illustrate the workings of an electric circuit. Highlighting the educational value of hands-on projects, it emphasizes the importance of practical application in learning. The step-by-step instructions provided cover everything from preparing the base to making the project visually appealing, offering a detailed roadmap for constructing an engaging and educational game. By demonstrating the principles of an electric circuit interactively, this project not only fosters creativity and patience but also underscores the practical application of classroom learning. Overall, this resource from Bot Shop aims to simplify the process of creating educational projects while engaging students in a fun and enlightening way.
We hope this blog and our future blogs will make your projects a lot easier. Please feel free to send us pictures of your projects. If you have any questions, we would like to hear from you.